Adding, Editing, Masquerading & Removing Employee Users
Adding Employee Users
All Astro Accounts start with a single Admin User; this user is generated using the email address that you registered with. Admin Users have access to all aspects of your account, such as Billing, Program Enrollment, Reporting, Account Management, and Password Changes.

We strongly recommend that you add a Cashier User to your account that your Staff can use to login to Astro. Cashier Users have limited access to the account and cannot make changes to things like Billing, Enrollments, Reports, or User Passwords.
- You can make one Cashier User Login that your entire Staff can share.
- Cashier Users can have a valid Email Address as their Username, or a word as their username, like "huxleyhousecashier."
- The Username, if it is an email address, can also serve as their Support Contact (which will be how they communicate with our Help Desk), or you can add your Admin's Email Address as the Support Contact by selecting it from the Support Contact drop-down - this will make it so that all correspondence with the Astro Help Desk will be sent to your email address.
Adding a New User to a Single Location Astro Account
From the Actions menu, scroll down and select Account Management. You will need to be logged in as an Administrator User in order to do this.
Click on the Add User icon next to My Users to add employee users.
A pop-up will appear where you can enter your Manager/Administrator's info or your Staff/Cashiers' info into the fields provided.
Username / Email Address & Support Contact
Each User must have a valid email address. When a Support Ticket is submitted to the Help Desk or an Exception Ticket is created after an exception is added to a Program Card, Astro Support will reply to the email address associated with the Employee User that created the ticket.
If you want your staff to be able to communicate with support directly, make sure their staff email address is the Username.
If you want Support correspondence to be directed to someone else on staff, choose their email address from the Support Contact drop-down menu. If you choose an email from the Support Contact list, you can make the Username anything you want.
User Type
The User Type field gives you a choice between Cashier or Administrator level access. Cashier Users have limited access to Astro. They can only Add Customers, Checkout Customers, and orchestrate Kiosk Slideshows. Administrator Users have access to all of Astro.
All Astro Accounts should have at least one Admin User to handle tasks such as Enrolling in Programs, Account Management, Reconciling of Reports, and Billing.
All Astro Accounts, and locations, should have at least one Cashier User, which all members of your staff can share.
Fetch Current IP Address
You can add your store's IP Address to your User accounts. This will make it so that your employees can only use that login to access your Astro account if they log into Astro on a device that is hooked up to your store's internet/WIFI.
- This is helpful if you have employees that work at more than one location since it will keep them from accidentally logging into Store A if they are working at Store B.
- This will also keep employees from being able to log into your Astro account from their homes or anywhere else outside the reach of your WIFI.
- Make sure that you have your Staff test out a new User that has an IP Address added to it to make sure they can log in.
- If you have a security measure in place that automatically changes your IP Address every couple of months, you will need to update the IP Address associated with your Users when you find they are unable to log in.

If Master Admins want to be able to log into Astro from anywhere, do not add an IP Address to your Username.
How to Fetch your IP Address and Add it to a User
To Fetch the IP Address, click on the red words Fetch IP Address below the Restrict Login to IP Address field, and Astro will fetch the IP Address for you. It will be a series of numbers separated by periods. Ex. 123.13.123.123.
Creating One Cashier Account for Multiple Registers
You can have multiple registers linked to the same Cashier User so your staff will only have to remember one Username and Password, and all Support Tickets will reply to one email address.
When creating the Cashier Account, you will need to select how many registers will be linked to this Cashier User, 1 through 6 (if there are more than 6 registers at one of your locations, contact Support).
When your cashiers log into Astro using their shared Cashier Username, they will need to select the Register Number they will be working at. After a cashier logs into Register #1, the other cashiers will no longer see Register #1 as an option.
Editing Existing Employee Users
Should you need to edit any user info (Name, Email, Password) or change security levels (Administrator / Cashier), you may do so by selecting and clicking on the user’s Name under My Users. You will need to be logged in as an Administrator to access Account Management and make any changes to My Users.

Adding Employee Users to an Additional Location (Multiple Location Accounts)

You must set up your Users correctly, especially for a Multi-Location Account. You want to make sure that your staff is logging into the correct store when they come into work for the day. This ensures that your customers' purchases and redemptions are recorded on the correct Location Account, and most importantly, it ensures that your reimbursement credits are issued to the correct location when items are redeemed and reported to your distributors.
When we first set up your Multi-Location Account on Astro, you will have one Master Location that will have one Master Admin User. Any other Admin Users that you add to your Master Location will have Master Admin status and will be able to perform Admin functions across the entirety of your account.
When you are ready to Activate your Free Trial Account, contact your Astro Agent so they can help you add your Additional Locations.
Once an Astro Agent has added your Additional Locations, when you log in as a Master Admin, you will see them listed under Actions > Account Management, under My Additional Locations.
Click on the store's name in order to add that location's Account Management page.
To confirm you are in the right place, glance over at the store name. Then to add your first User, click on the Add User Icon.
If you want your Store Managers to have a higher level of access to their store, you can make then an Admin. Additional Location Admins can enroll their store in programs, Reconcile their store's Redemption Reports, Edit their store's Employee Users, and edit their store's Account Management. They will not be able to perform any of these functions on any of your other location accounts - only Master Admins can do this.
If you do not add an Additional Location Admin to an Additional Location, you can still use your Master Admins to perform admin duties. Find out more about how a Multiple Location Account functions on Astro here.
At the very least, you should add a Cashier User that your Staff can use to log in while they are checking out customers and recording their qualifying purchases.
- All you need is one Cashier User, which can be shared by all staff working at that location.
- The Username can be an Email Address.
- The email needs to be valid, and your staff at that store should be able to access it while they are working just in case they need help from our Support Staff.
- The email address needs to be different from any other email address that has been added as a Username.
- The Username can be a word, such as "menowcashier." It is a good idea to match the username to the store with which the Cashier User is associated. This will help your staff make sure they are logging into the correct location.
- If you have more than one Register, add that number to the "Number of Cashier Accounts" field.
- You can add one of your Master Admin User's Email Addresses to the Support Contact field if you want all correspondence between your staff and Astro Support to go to your email.
- You can Restrict the Login to your store's IP Address. This will make it so your staff can only login to that store's Astro Account if they are on a device connected to that store's WIFI/internet. This will ensure that your staff is always logging into the correct account when they are checking out customers.
- If you are setting up this User while connected to that store's internet, you can click Fetch Current IP Address. If you are adding this new User from home or while at a different location, do not click Fetch. Instead, you will need to wait until you are physically at that store to Fetch it, or you can contact one of your staff members and see if they can locate the IP Address on the router at the store or if they can google "What is My IP Address" from the store. It will be a series of numbers like this 00.000.000.00
- After you save the new User, have someone at that store test the login to ensure they can get in. If they cannot log in, edit the user and blank out the IP Address field.
Here's a Cashier User that I made for my Additional Location:
My store is named MeNow's Num Yums so that's what I called this Cashier User. The username is not an email address, but I added my Master Admin's email address as the Support Contact. This store also has 2 registers. I also made sure that the password was complex enough to make it secure but not too complicated as to make it hard for them to remember. (Passwords can be edited by Master Admins or Additional Location Admins added to the same Location).
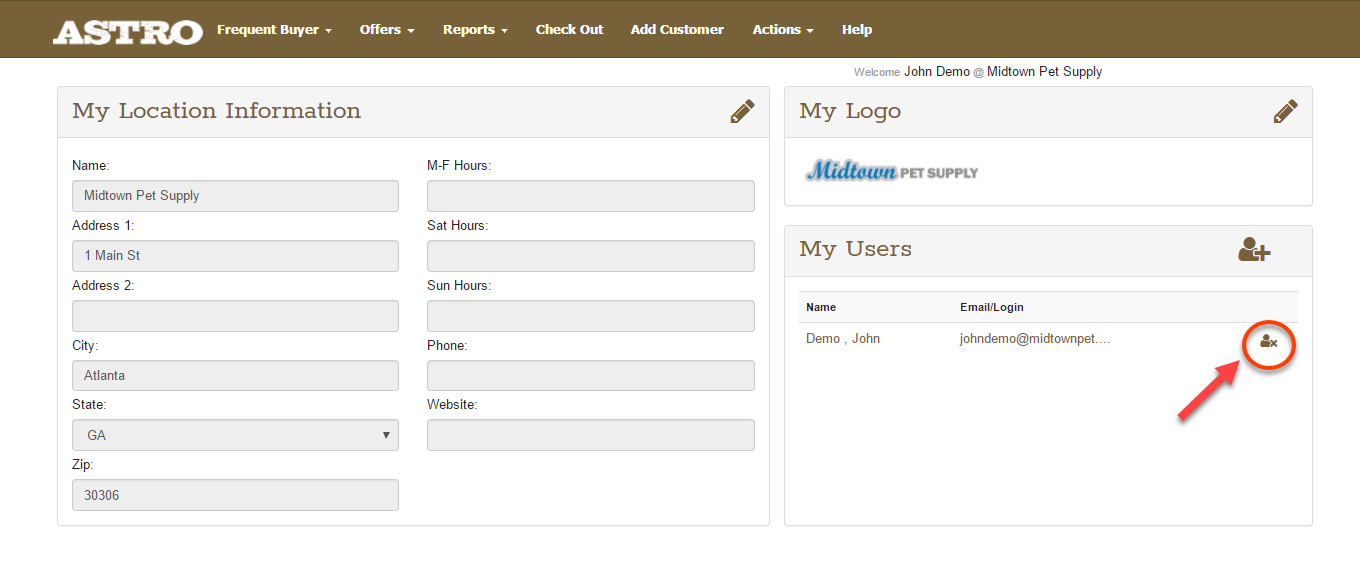
Removing an Employee User
There will be occasions when you need to remove a Cashier or Administrator user from your team.
To remove a User, simply click on the Delete User icon beside their name. You will be asked to verify that you want to remove the user. Selecting "OK" will remove them from your cashier/administrator list.
Extras: Masquerading Under a User (Multiple Location Accounts)
This is a nice trick if you find you need to do something on an Additional Location account from home or while at another location. This is really only useful if you need to edit a card without disrupting a purchase or redemption's location data.

Reports, Enrollments, and Account Management, can all be handled while logged in as a Master Admin without the need to masquerade.
If you need to access one of your additional locations, you can do so by logging in under your Master Admin (any Admin account linked to your main location) and masquerading as one of the additional location's Users.
First, you will need to go to Account Management, located under the Actions menu on your top toolbar.
Find My Additional Locations listed at the bottom of the page; below is where you will find your additional locations listed. Click on the name of the store you want to access. This will bring you to that location's Account Management page.
Then click on the Email Address or Username of one of that store's Users. (It doesn't matter if the User you are masquerading as is a Cashier or an Admin, you will still have Admin access while masquerading.)
You will know you are under one of your multiple locations if you see that location's name at the top right of your screen where it says "Welcome [Name] @ [Location Name]. To stop masquerading and return to your main location, click on the Astro logo at the top left of your screen. Make sure it now says your main location's name at the top right below the top toolbar menu.
If you need access to one of your additional locations for more than a couple of minutes, we recommend that you log into that location directly.
Related Articles
Access Troubleshooting and Login Issue | Astro Retailers
If you are unable to get into Astro to record a customer's purchase for any reason, print the customer's receipt and set it off to the side so you can add their purchase to their Pet Owner account when you regain access to Astro! If you are ...Converting a Pet Owner Account to an Employee Account
How to Convert a Pet Owner account to an Employee Account You must be enrolled in an Employee Feeder program in order to see the Employee account options. Converting via Checkout: 1. Go to Checkout. 2. Lookup their account and select. Or create a new ...Actions Menu | Application Preferences | Adding Custom Fields to Transaction & Redemption Reports
How to Add Custom Fields to Astro Transactions and Redemptions You can add additional fields to your Checkout process. They can collect any kind of information that you like. Most retailers use Custom Fields to collect their employees' initials or ...Cashier v. Admin
Owners and managers have different levels of control and responsibility than a cashier or associate in your store. The same is true in regard to the Astro Loyalty suite. This has been done for your convenience, security of information, and ease of ...Setup Custom Button Using Employee Pins | Lightspeed | Partial Integration
Employee Pin Custom Button Setup: If you have set up pins for your employees the URL format for the Custom Astro button is different. "With Lightspeed, each employee has their own pin that they put in when doing a transaction, so when another ...